The Battle, in Brief
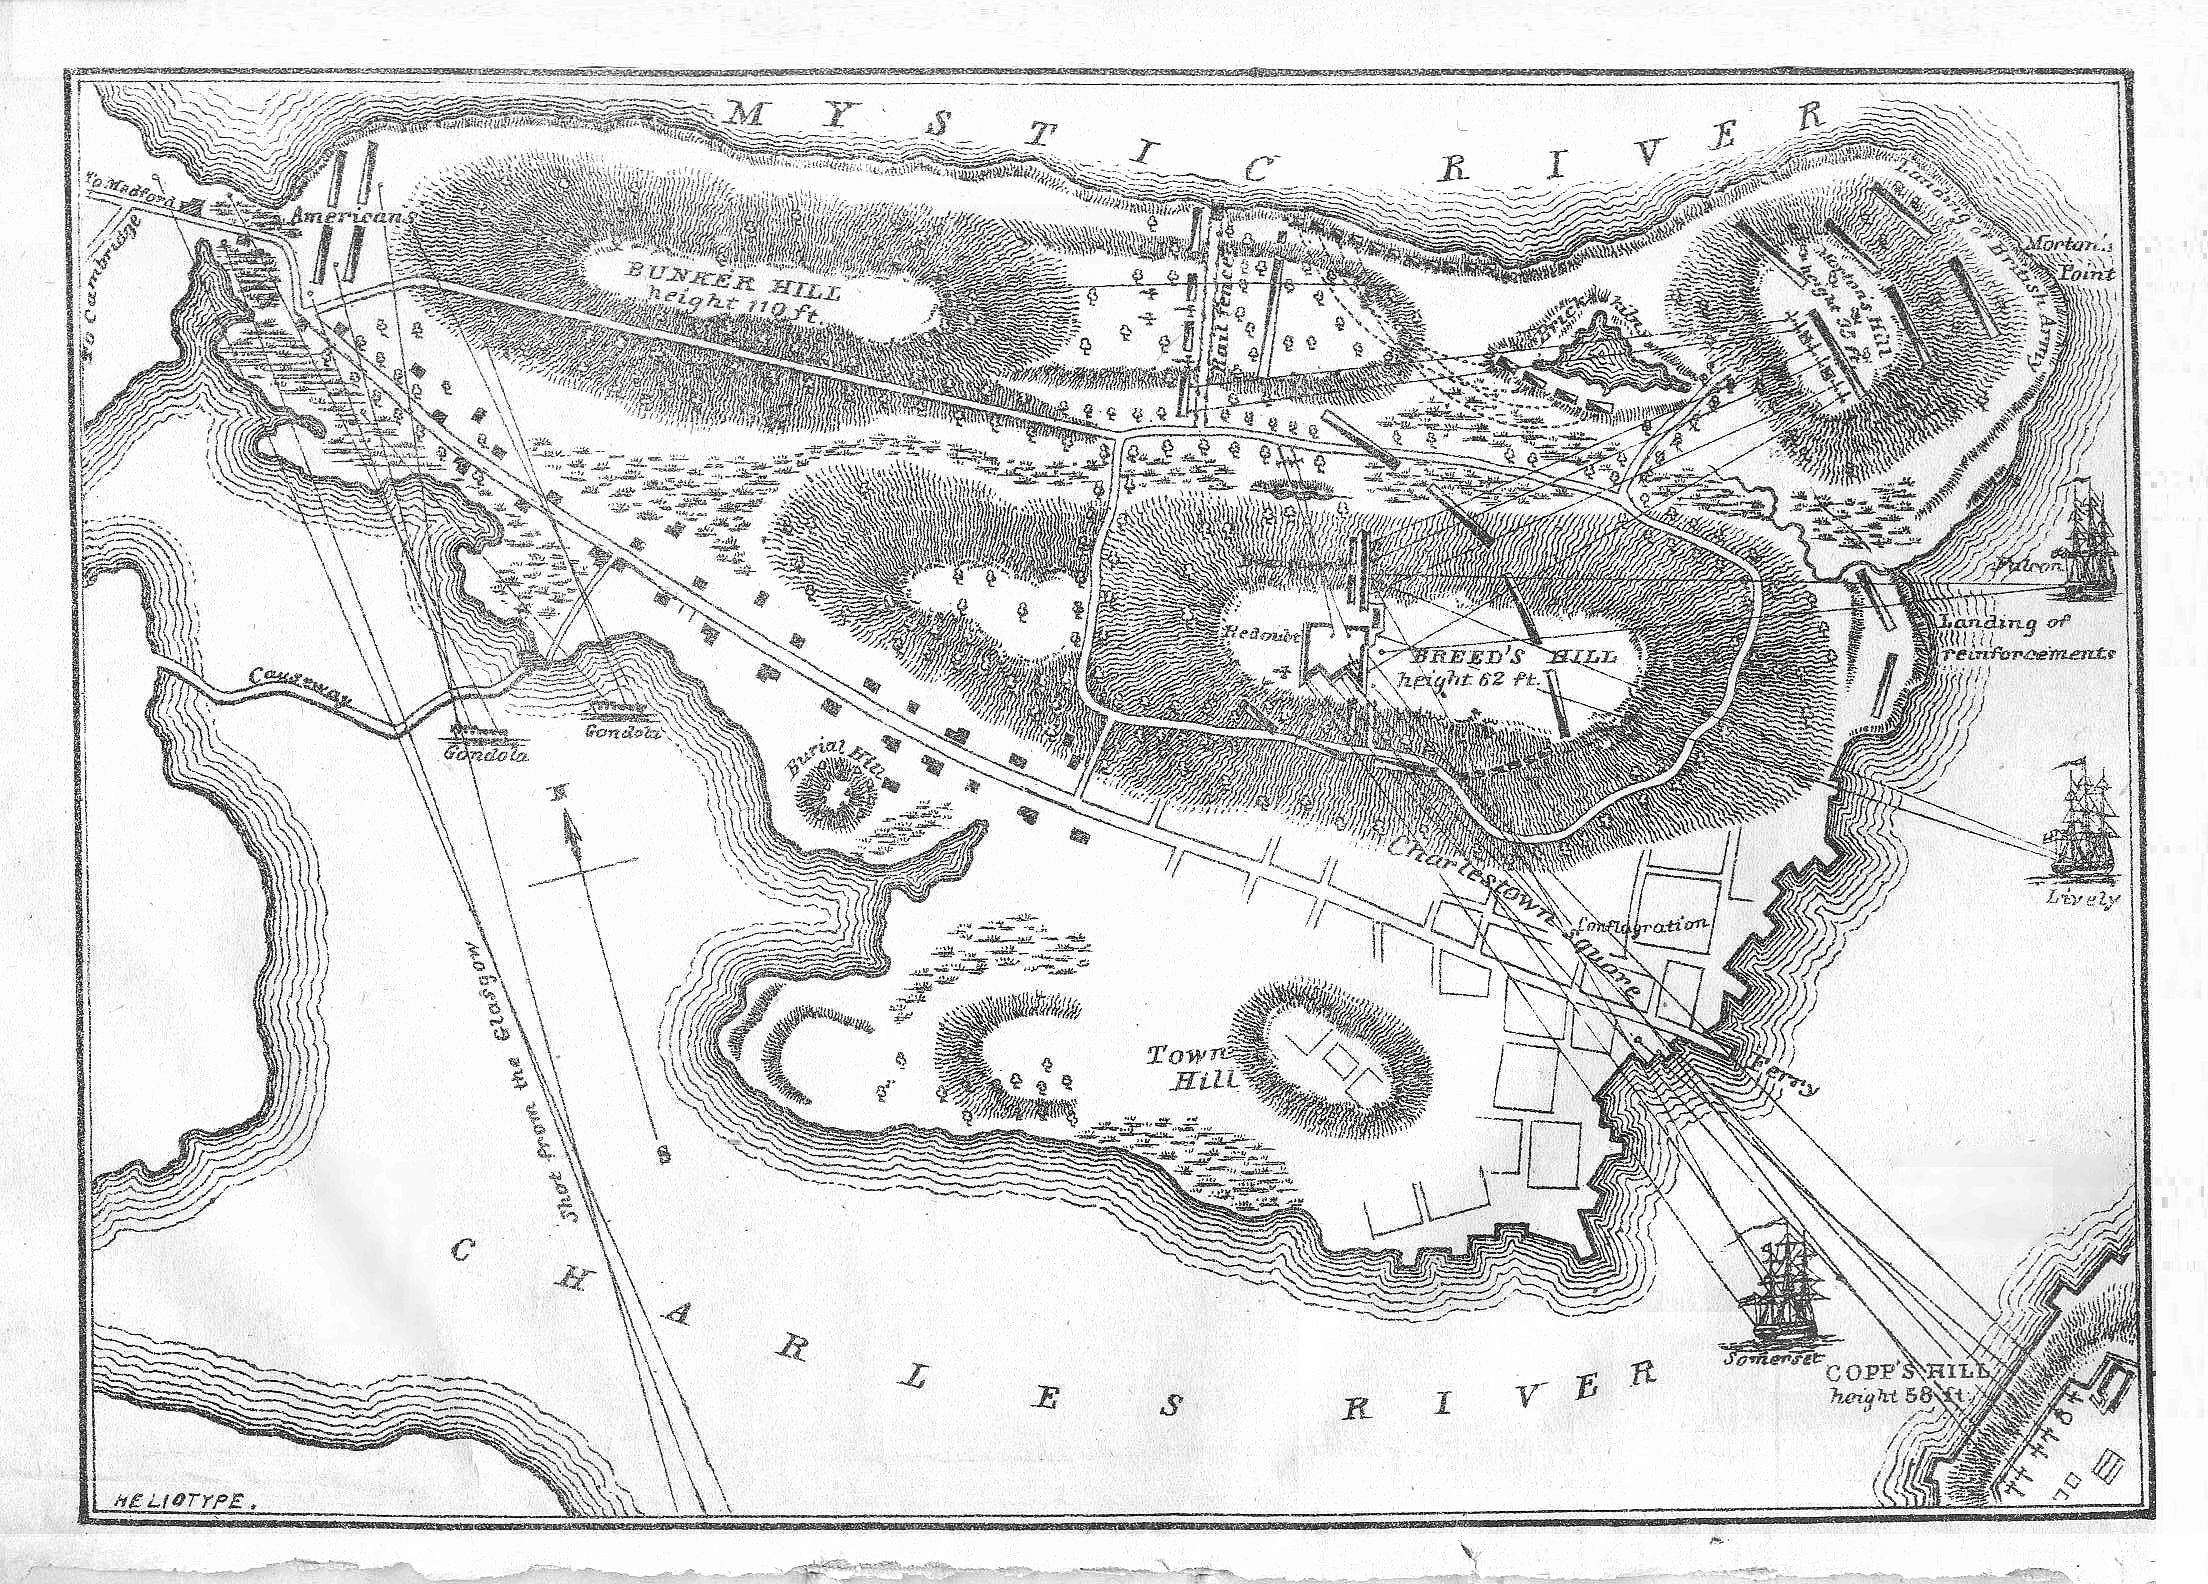
On June 17, 1775, two months after Lexington and Concord, American militia forces occupied
the Charlestown peninsula across the harbor from British-held Boston. Their orders were to
fortify the high ground to prevent the British from using it to dominate the city.
The fortification they built overnight was on Breed's Hill – the lower,
closer hill – rather than Bunker Hill, the taller prominence 600 yards behind it toward the
Charlestown Neck. The choice was likely a mistake, or the result of confused orders; it placed
the redoubt closer to British guns and made reinforcement and retreat more difficult.
The American line also extended to the left of the redoubt, down to the Mystic River, anchored
by a rail fence. This position – held largely by New Hampshire troops under Colonel John Stark –
was where the British advance along the river beach was decisively repulsed. It is also where
Henry Dearborn served during the engagement.
The British launched three assaults. The first two were repulsed with severe casualties;
on the third, the Americans ran low on ammunition and fell back. The redoubt was taken.
The British suffered over 1,000 casualties in a force of roughly 2,500 – nearly 40 percent.
Conventionally recorded as a British tactical victory, the battle was understood on both
sides as a demonstration that American militia could stand against regular troops.
Washington arrived in Cambridge on July 3, 1775, to take command of the Continental Army.
His first general order cashiered an artillery officer for cowardice at the battle. His
second act was to present Israel Putnam with a commission as Senior Major General –
second-in-command of the entire Continental Army.
Why the Geography Matters
When Henry Dearborn wrote that Putnam "remained at or near the top of Bunker Hill" for
the duration of the battle, he was naming a specific place: not the hill where the redoubt
stood, not the line where the fighting was heaviest, but a separate prominence 600 yards
behind both – toward the Charlestown Neck, across open ground.
This distinction matters for two reasons.
First, it is the difference between a commanding officer managing a battle from an exposed
position and one deliberately avoiding the fighting. If Putnam was on Breed's Hill –
at or near the redoubt, or moving along the line between the redoubt and the rail fence –
no cowardice claim survives. Dearborn's allegation depends on the specific geography of
Bunker Hill as a place apart from the action.
Second, as the historian Increase Tarbox established from testimony and Dearborn's own
account of British fire trajectories, Bunker Hill was not a position of safety. The balls
fired by British infantry and artillery, overshooting the men at the redoubt, continued
uphill. Colonel Swett, in his history of the battle, recorded that Bunker Hill was
"completely exposed to the combined fire from their ships, batteries and field pieces."
The premise of the accusation – that Putnam chose Bunker Hill as a refuge from danger –
does not hold on the physical evidence of the battle itself.
Read the full rebuttal →
Read the 63 eyewitness testimonies →